Pages

Tuesday, 31 December 2013

The Gingerbread House Fail

HAPPY BELATED CHRISTMAS AND HAVE A HAPPY NEW YEAR!!

OK now that's out of the way... 

As Christmas is basically finished, I have reached the point in which proper work is supposed to be done to prepare exams coming up but I am just not feeling it, so I am trying to cling on to any thread of Christmas that I can. If I am still doing festive things it is still Christmas and I don't have to work... shh... It is the truth.

So I decided to build a gingerbread house with my brother... 

I used Mary Berry's Recipe as I have never done this before and the quantities are TOO big to make one of my own... 

And we began and it seemed to be going fine, after a slight hiccup about measurements, the dough was coming together. But then when we tried to roll out the dough it wouldn't stick together. 

We tried everything, and I mean everything, we added milk, water, butter, but nothing worked... HOW DO YOU FIX THIS?! Seriously I want to know, so any ideas leave in the comments below! 

Instead of throwing about a kilo of mixture away, we salvaged it and made millions of ginger biscuits. We even put crushed boiled sweets in holes in the middle of them, to make them like stained glass, oooooooh. Well fancy, I know.

I don't have a picture of them because they are just not pretty but they look like iced biscuits and they taste lovely. Claps for Mary!

Anyway, I should get back to eating the mountain of biscuits as I don't want to spend the whole of 2014 living off them.

Sunday, 22 December 2013

Rocky Road Bites

A simple delicious thing which you can make from pretty much anything in your cupboards.

220g Chocolate: 120g Milk and 100g dark but this can be edited.
75g Marshmallows
75g Chopped Mixed Nuts

Melt the chocolate in a bowl over a pan of simmering water.


Once completely melted, stir in the other ingredients - they don't have to be the ones I have mentioned. You could use digestives, sultanas, popcorn if you really want etc. They should be covered in chocolate. 


You can pour the mixture in to a greased tray and cut in to squares but I have been inspired by Nigella and I prefer them in small dollops. They are easy bite size chunks without slicing.


Leave to cool, if you put them in a fridge the shine of the chocolate will fade, but obviously it is often the only solution.

Saturday, 21 December 2013

Christmas Countdown: Iman's Cake

On Monday it was my friend Iman's birthday, so I made her favorite cake of mine...

LEMON DRIZZLE CAKE


Ingredients:

125 g unsalted butter
175 g caster sugar
2 large eggs
zest of 1 lemon
175 g self raising flour
2 tablespoons lemon juice
2 tablespoons milk

For the syrup
juice of 1 ½ lemons
100 g caster sugar


23x13x7cm loaf tin lined (you can get slot in pull out ones)


1. Preheat the oven to 180 degrees fan/ gas mark 4

2. Cream together the butter and sugar together until light and fluffy.
3. Beat the eggs and lemon zest in to the butter and sugar.
4. Slowly fold in the flour and then add the lemon juice and milk. 
5. Once all combined, pour into the prepared loaf tin and back for 45 mins or until risen and golden. To make sure it is cooked, insert a cake tester or skewer and make sure it comes out clean.
6. The prepare the syrup, put sugar and lemon juice in to a pan. Heat until the sugar dissolves, make sure that it doesn't burn.
7. Take the cake out of the oven and stab it in order to create holes in the top of the cake.
8. Pour the syrup over the top and let is absorb it while the cake cools.
9. Remove the cake from the tin once cooled, not before or it will all fall apart due to the liquid.


insert boring photo of a loaf cake..
I promise it tastes lovely and if you want to make it prettier you can make a glaze by mixing icing sugar and lemon juice and drizzling it over the top. 

Saturday, 14 December 2013

Christmas Countdown: Christmas Tree Meringues

Yes, I have got rid of the day countdown as I have not exactly been consistent...

I love meringues, they are basically sugar, what is not to love?
But they are not very festive... so here is a simple way to make them so. TURN THEM INTO CHRISTMAS TREES!

Easy.

If you follow the meringue recipe which I have shown earlier on this year =  http://girlbaking.blogspot.co.uk/2013/10/perfect-meringue-recipe.html

BUT, add green or blue and yellow food colouring once the sugar has been added.

Then with a slightly spiky, or zig-zagged nozzle, pipe the meringue. I find that the easiest way to fill a piping bag is to rest the nozzle in the bottom or a tall glass, then roll the bag around the rim so that it stays open. You then just drop the mixture in.

Pull away from the greaseproof paper in short bursts to give a slightly layered affect.

Once they have all been piped, this may take a while to perfect a tree shape (some of mine were a bit lopsided), add a small sugared star on to the top of the tree to give it that christmas tree.

DO NOT USE SILVER BALLS. they melt and burn holes in the meringue, but other decorations should be fine... edible glitter maybe?

Bake for about 35 mins and then remove.

For the final touch, take some "Rolo"'s or other similar chocolates. Melt them at the ends. Then stick them to the base of your meringue to create a trunk-like effect.

Then, ta-da! your meringues made festive and perfect little bites of Christmas.


Pre baking... they look white but I promise that they were green!


The finishing touches... they do stay green the lighting is lying to you...

Tuesday, 10 December 2013

Christmas Countdown: Days 9/10: Easy Victoria Sponge

For those fussy people who don't like christmas cake... There is always one....

So.....

Preheat the oven to 180 degrees Celsius or gas mark 4.

Cream 225g of butter with 225g of caster sugar until paler and fluffy. Standard.

Add 4 eggs bit by bit alternating with half of 225g of self-raising flour. eggs. bit of flour. eggs. bit of flour. Repeat.

Then stir in 2 tsps of vanilla extract. (to make it more Christmassy, you could use cinnamon instead)

Fold in the rest of the self-raising flour, incorporating as much air as possible.

If the mixture is too stiff add some milk.

Put half the cake mix in one greased tin and the other half in the other greased tin.

Bake for around 30 mins. Or until golden brown.

To test if the cake is cooked, a knife should come out clean when stabbed in the top and bounce back when tapped gently on the top.

Sandwich the cakes together, with cream, jam, or in summer fresh fruit... perhaps not at Christmas...

Then ice festively!

Sunday, 8 December 2013

Christmas Countdown: Days 6/7/8: Christmas Tree Biscuits Recipe

No posts for a few days, blogging every day is harder than I expected it to be...

Anyway these are very easy, delicious biscuits which are especially good around Christmas as they are full of spices. Very simple dough, no resting required and a quick bake.

Preheat the oven to 190 degrees fan and grease a couple of baking trays.

Cream 125g of butter and 125g of caster sugar together. Once creamed add one egg. 

Then mix in 225g of plain flour and 2 teaspoons of mixed spice in to the mixture.

Then make in to a dough, dust a surface and rolling pin with flour and then roll the dough in to a thin sheet. 

Cut in to shapes and place on baking trays. As these biscuits can be used for Christmas tree decorations just cut a small hole in to the top of the shape so that a ribbon can be pushed through.

Bake for 10 -15 mins or until golden brown.

Leave them to cool and then decorate as you wish. 

I have just splattered the biscuits with different coloured icing to make it even quicker, obviously you can spend more time on them...


See, bit messy, but simple.

Thursday, 5 December 2013

Christmas Countdown: Day 5: Quick note to say...

REMEMBER TO KEEP FEEDING YOU CHRISTMAS CAKE WITH YOUR LIQUOR OF CHOICE!

(Rubbish post I know, but I have nothing else to say!)

Wednesday, 4 December 2013

Christmas Countdown: Day 4: Apple and Blackberry Streusel

Another autumnal cake thing today, with blackberries and apples again... bit of a running theme apparently... oh well...

This is similar to something that I have made before... which I can't remember the name of...

Anyway, it is like a cake, with a fruity compote and then a crumble layer on top. What I have realized as I write this is that it is basically a crumble with a cake layer. The fruit used can be substituted with any fruit you want really, plum would be nice.

The cake is basically a normal sponge, a recipe to which is here. The fruit is then added on top, you don't have to do anything to it, all you have to do is rest it on top of the sponge. You then sprinkle a normal crumble which is made by mixing butter, sugar and a bit of cinnamon to give it that festive punch.

I don't have much to say about this as it is not my own recipe except that you should definitely try it as it is very warming as a pudding so perfect for this time of year.


Monday, 2 December 2013

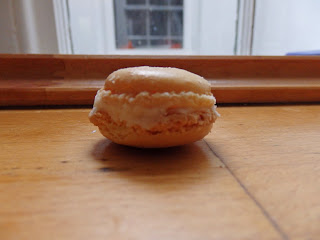
Christmas Countdown: Day 2: Lemon Macaroons

No, not the most festive of treats, but treats none the less.

Anyway, for those who don't know a macaroon is basically a meringue with ground almonds and extra sugar mixed in to it, it is then colored, pastel shades normally, and then piped in to small discs. The discs are then stuck together using a butter cream or other paste.

I chose lemon flavor as that is what John Whaite makes. However, from what I can gather, the flavor comes mainly from the filling, not the macaroon itself, meaning that I made a yellow macaroon with lemon butter cream. Simple.

I have never attempted macaroons before, and to be quiet honest it was very hard and I nearly cried while trying to put the mixture in to the piping bag. WHY IS IT SO DIFFICULT?!

I had, also, never eaten a macaroon before in my life, ever. So I don't actually know what it is supposed to taste like. But on a general cake scale they were yummy.

Mine were a little irregular after the whole piping disaster, which concluded with my having cake mix up my arm and on the verge of tears, but they were fine in other ways, and it's what is on the inside that counts!

Well that's what I tell myself anyway...


Sunday, 1 December 2013

Christmas Countdown: Day 1: Gingerbread

HAPPY ADVENT!

In the run up to Christmas, I am going to post every single day.

So to start it all off... Gingerbread...

Usually when one thinks of gingerbread, one thinks of a gingerbread man and family altogether happily in their little gingerbread house. Or if you are of my generation (but mainly if you are younger), Gingi from Shrek...

(property of es.shrek.wikia.com)

Anyway this is not gingerbread like the above, this is proper gingerbread, as in bread-like consistency gingerbread, the hard core stuff.

The main difficulties with making gingerbread is that it contains black treacle, which is a pain to get hold of and rarely have in your cupboards so you have to go and buy it specially. However as luck would have it, there was a tin of it already in my kitchen cupboard....weird...

Gingerbread is made by heating butter (150g) with muscovado sugar (110g), ginger from a jar, sliced, (2tsp), cinnamon (1tsp) and a hell of a lot of golden syrup (200g) and black treacle (200g) together over a low heat so that they melt.
You could also add a bit syrup from the ginger jar to make it more sticky and gingery.

*QUICK TIP: Pour a bit of oil over the spoon which you are going to use to measure out the treacle as then it doesn't stick, it just slides off!*

Put 1tsp of bicarb in 2tbsp of hot water until it has dissolved and is cool. Then mix with 2 eggs and 230ml of milk. Add this to the mixture which has just cooled. 

Beat the liquid ingredients in to 300g of plain flour, sifted. Mix this thoroughly until there are no pockets of flour as I have found in the past that the flour tends to clump together, which isn't so nice when eating... 

Pour in to a greased rectangular tin of about 30x20x15. And bake for 45 mins.

Then I find that if you pour a lemon glace icing over the top using water, lemon juice and icing sugar. Left to set, the lemon cuts through the musky ginger flavor making a nice contrast, and decreasing the heaviness.


Perfect to get you in to the festive spirit. 


Saturday, 9 November 2013

Cranberry and Citrus Christmas Cake Recipe

Yes, I went there. I said the "C" word and I am not taking it back!

Now is the time to make your Christmas cake if you haven't done it already, and for those of you who haven't, this one is for you.

This is a recipe of my own design and it is meant to fit in a 23cm round tin, obviously you can edit the measurements depending on your preferences.

To me, oranges and citrus fruits are very festive in flavour while the colour of cranberries, red if you didn't know, is as well. Thus they seemed to be the perfect combination.

Ingredients:

500g Raisins
400g Sultanas
125g Cranberries
110g Glace Cherries
120g Mixed Peel
120ml Brandy (you can use sherry if you prefer)
225g Butter
195g Brown Sugar
Zest of 2 oranges
4 eggs
2 tbsps Orange Marmalade
295g Plain Flour
55g Ground Almonds
1 tsp Almond Essence
1 tsp Nutmeg
1 tsp Mixed Spice
1/2 tsp Cinnamon

Method:

      1. Put all your dried fruit into a bowl, pour the brandy over the top, cover and leave to soak overnight.


      2. Preheat your oven to 150 degrees / gas mark

      3. And line your tin. Now this is more complicated than it sounds... Wrap brown paper around the outside of the tin so it stands above the top of the tin by 10cm, secure with string wrapped around it. Then line the tin as normal with butter and baking paper.

      4.Cream the butter and sugar together.

      5.Beat in the orange zest

      6. Add the eggs one at a time, beating well after each one, and then the marmalade.

      7. the dry ingredients together and add to the creamed mixture alternately with the dried fruit until all is combined.

      8. Add the almond essence and mix thoroughly.

      9. Put the cake mix into the cake tin and bake for about 3/3.5 hours or until a skewer comes out clean. If your oven is quite savage, like mine, I would advise making a hat for your cake out of tin foil to prevent the top from burning.


      10. When the cake is finished wrap in foil and put into a tin immediately to cool so that the steam is trapped and keeps the cake moist on the top.

      11. Then re-wrap in tinfoil, (don't cover the top this time) and return to the tin.

      12. You will need to "feed" your cake with brandy every week in order to preserve the cake and add extra flavour.
      I hope that was helpful and you are now all going to go and bake your own Christmas cakes rather than buying one. I will do a post on icing it just before Christmas day. 

      And with that, good luck! 

      Sunday, 27 October 2013

      Perfect Meringue Recipe

      Sorry to be boring but I haven't posted in a while and I thought I should just post something... anything, as long as there is a baking theme so here we go.

      Once you've made pastry there tends to be egg whites left over which sit in the fridge for a few days before it is decided perhaps they shouldn't stay there any longer. So I tend to try and use them up by making meringues.

      Meringue Recipe:

      Ingredients: 
      1 egg white
      60g white caster sugar

      This can be edited to the amount of egg whites that you have as it is often easier to multiply quantities than divide, well, that's what I have found anyway. 

      Method:

      1. Preheat the oven to 140 degree fan or gas mark 1

      2. Whisk the egg white until forming soft, fluffy peaks. They should still be moist because over whisking means that they dry out and become useless. The egg white(s) should form peaks.

      3. While continuing to whisk add small amounts of sugar until the mixture becomes stiff and glossy peaks and you should be able to hold the bowl upside down above your head without fear of your hair being ruined. (I wouldn't recommend actually doing this, but you get the idea)

      I prefer making meringues using a mixer as it is quicker and to be quite honest easier on the arms, but if you don't have one this should take 5-10 minutes depending on the size of your arm muscles. 

      4. Dollop the mixture onto the a baking tray, lined with grease-proof paper, being careful not to knock out any of the air... don't be to worried about the shape. The rustic, un-perfected look is perfectly fine.

      5. Cook the meringues for about 45 minutes which makes the pale and dry. But if you want them a bit more golden, obviously leave them in longer, about 60 minutes.

      Play it by eye as it depends on the oven and the look that you want to achieve. Ideally they should sound hollow and crack on heavier touches. 

      I will try to be more interesting next post.

      Tuesday, 8 October 2013

      John Whaite Bakes

      Tomorrow is the Great British Bake Off quarter final, it is getting serious now! *cue screams*

      So in celebration of the fact it is nearly the GBBO quarter final and the woes that I can never enter, I did a selection of bakes from last years winner's book, John Whaite Bakes. 

      Also apologies in advance about the picture quality, it is appalling and I don't really know why, except camera troubles. 

      I started off by baking his "Simple Strawberry Tart" - as, let's face it summer is coming to a close...or is over altogether. 

      The tart is a shortcrust pastry base filled with creme patisserie and then covered in strawberries. It was a sweet and delicious tart which I know that when summer returns, if summer returns, I will definitely be baking this again. It also meant I had to make creme pat for the first time, exciting!


      I then attempted to create a plaited loaf. Which soon became two plaits of three strands which is slightly less impressive. For some reason, the dough was a complete and utter failure. And although it tasted ok, the strands didn't become one in the oven and the texture was a bit off. I don't like making bread!


      In a quest to find a simple thing to bake I turned to his Caramel Shard Cookies which involves making a simple cookie dough and a slab of caramel, which is smashed. They are then combined, to make a rather dangerous cookie dough mixture. 
      The odd thing about this recipe is that they are baked as balls, they are not shaped before they go in to the oven, but suprisingly enough they baked perfectly. 
      They were fab and I was eating them for a whole week, the vision of health that I am. 


       Doesn't it look beautiful!


       John Whaite, if you are reading this, your book is gold, I love it. Everyone should buy a copy just for the recipes I have mentioned above, if nothing else.

      I cannot wait for Bake Off, as sadly enough, along with Downton Abbey, it is the highlight of my television week.

      And with that all that remains to be said is, on your marks, get set, bake!

      Thursday, 12 September 2013

      Chocolate and Orange Crumble Muffins

      The initial recipe for this contained raspberries but as I made these in New Zealand where it was winter they were pretty hard to come by. So I replaced it with orange which undeniably goes with chocolate. 
      I made a normal chocolate muffin mix. Then at a final stage you add in the pieces of orange and some orange zest.

      Demonstrated here by my other cousin Jake. 

      They are then put in to baking trays. And you make a chocolate crumble - chocolate, sugar and butter made in to crumbs.
      The crumble is sprinkled across the top of the muffins as generously as you like.
      They are baked.
      The muffins themselves were moist (eww, horrible word) and light but to be honest they probably would have been nicer with raspberries. But I would still give it ago.


      Friday, 6 September 2013

      New Zealand Madelines

      While I was in New Zealand over the summer holidays I found out that my relatives who live there had a Madeline tray. So it was whipped out and the opportunity was seized by all.

      The mixture for madelines is very similar to that of a sponge except it has a lemon in it.

      You start by whisking the sugar and eggs.

      Demonstrated by my cousin Kiri


       You then add a lemon, in this case from their lemon tree in the garden.


      The lemon rind has to be grated off in to the mixture, the rest of the lemon can be discarded.


      Then the remaining ingredients are added and whisked to the normal cake mixture. 


      You then dollop the mixture into the madeline tray and bake for about 15 minutes. 


      They then come out of the tray and due to the lovely shape of the mold they look quite nice even if they are slightly burnt. 

      Saturday, 31 August 2013

      Perfect Butter Cream Recipe

      Yes, it has been a long time but I am finally writing this recipe which makes fab butter cream icing.
      It is a slight variant on the recipe in Bee Nilson's "The Penguin Cookery Book" which everyone should look for in their local charity shop as I have never seen it anywhere else and it is amazing.

      Ingredients:
      250g icing sugar
      35g unsalted butter
      3 tsp water or milk
      1 tsp vanilla extract (or whatever flavoring you want)

      Method: 
      Mix butter on it's own in order to soften it
      Then beat in the icing sugar
      Add the liquid and extract in order to create the desired consistency.


      I find that in order to create a smooth butter cream icing the best thing to do is to just keep mixing for as long as possible so that any lumps however small are no longer there.

      Sunday, 28 July 2013

      Butterfly Cakes

      The butterfly cake is a simple yet delicious variant on the fairy or cup cake. It is the same key recipe with a more interesting topping.

      Once the cakes are made and they have cooled. You remove the top of the cake and cut it in half (these halves are the cakes "wings").

      You fill the whole created by the top being removed with buttercream. Although I am not a big fan of buttercream, I have found a recipe that creates a very sweet and lump-less cream. I will post this soon. 

      The "wings" are dipped in a melted chocolate of your choice (I chose white) and then dipped in hundreds and thousands or sprinkles. They are then stuck in to the buttercream, with luck creating the appearance of a butterfly. 


      Sunday, 21 July 2013

      TODAY IS MY BIRTHDAY!!

      I am 16 today!! YAY FOR ME!! 

      Anyway as this is cake themed, here is a cake-y Google which I was greeted with this morning... 


      I was probably a little bit too excited by this but yes Google wished me a happy birthday. Jealous? 

      And here is my birthday cake which my mother loving created and was delicious. It was an sponge covered in elderflower cream and strawberries, it was summery and light. AND HUGE! 


      And now it is time for summer. 

      Wednesday, 17 July 2013

      Mad Hatter Jam Tarts, Brownies and Polka Dot Cookies

      Last weekend it was my birthday party so I did a bit of baking in preparation and these were the result.

      First, jam tarts which are names "Mad Hatter Jam Tarts" mainly due to the strange way in which the pastry is made. Two eggs are boiled the egg whites are removed and the yolks smashed up and mixed with the normal pastry ingredients. The pastry is left to chill over night and then baked with jam in it. Once out of the oven a raspberry is placed in the middle of the tart as decoration.


      I then made polka dot cookies which are basically cookies with Smarties on the top, which adds colour and makes them look more appealing. They are not particularly daring as a recipe but they are chewy and cookie-y, just what they are supposed to be. 


      Finally, I made chocolate brownies. This recipe was supposed to have rum and orange juice in it but I decided to leave them out as I didn't want the taste of them. However it didn't impact them that heavily, it did make them a little fudgier which is no bad thing! 


      So that was my contribution to my birthday party which was lovely as the whether was so warm and sunny. Great for a barbecue and outdoor film screening.

      Perfect. 

      Monday, 15 July 2013

      Victoria Sponge

      Now, everyone has made a Victoria sponge at one time or another, simply because it is so simple to do and you can create your own methods of making it. I have my own method but of course I have to try Annie Bells, after this I will write my own method up for you.

      So, obviously her first step is to cream butter and sugar together. You then pour in all the eggs and mix it, which makes the mixture very lumpy and I was slightly worried by it.

      Then you add the self-raising flour and baking powder which again I was sceptical about as I never put more than one raising agent in to a cake but it turned out alright in the end. The recipe says to add milk, which I don't put in unless the mixture is too dry.

      Also it says to bake the cake for 50 minutes but my oven is very fierce so mine was cooked in only 25.


      I then layered the cake up with strawberries and cream to make it extra summery.


      I then place the second sponge on top of the cream and then dusted it with icing sugar over a strawberry leaf to make a pretty pattern - I am just so arty!


      The cake although a different recipe to my own, it was still soft and light. It was very tasty but because of the stress of the recipe itself, as it is not mine, I don't think I will use it again. However it was good and a very summery and fresh cake especially with the cream and strawberries.